

Master Data in SAP FICO: General Ledger Account Codes and More
In this session of our SAP FICO tutorials, we will go into the “Masters” segment of the SAP FICO module. In this “Masters” session, we will learn how to create and manage various master data in SAP FICO. We’ll focus on:
Thank you for reading this post, don't forget to subscribe!- General Ledger (GL) Account Codes: Creation and Extension
- Primary Cost Elements
- Maintaining Cost and Account Activity Types
- Allocation of Cost Elements
- Secondary Cost Elements
- Vendor Master Codes
- Customer Master Codes
- Internal Order Master
- Asset Master Codes and Sub-Number Codes
- Displaying Asset Master Codes
- Bank Key Master and House Bank Creation
We’ll see the different transaction codes used to achieve these tasks. Let’s begin with the General Ledger Account Codes.
General Ledger (GL) Account Codes
As we all know, the General Ledger comes under Financial Accounting. A GL account number identifies the account code within a specific chart of accounts. Before any financial posting can be made, each GL account must be defined for its corresponding company code. For example, let’s consider companies such as Greaves Cotton Limited and Premium Energy Transmission Limited.
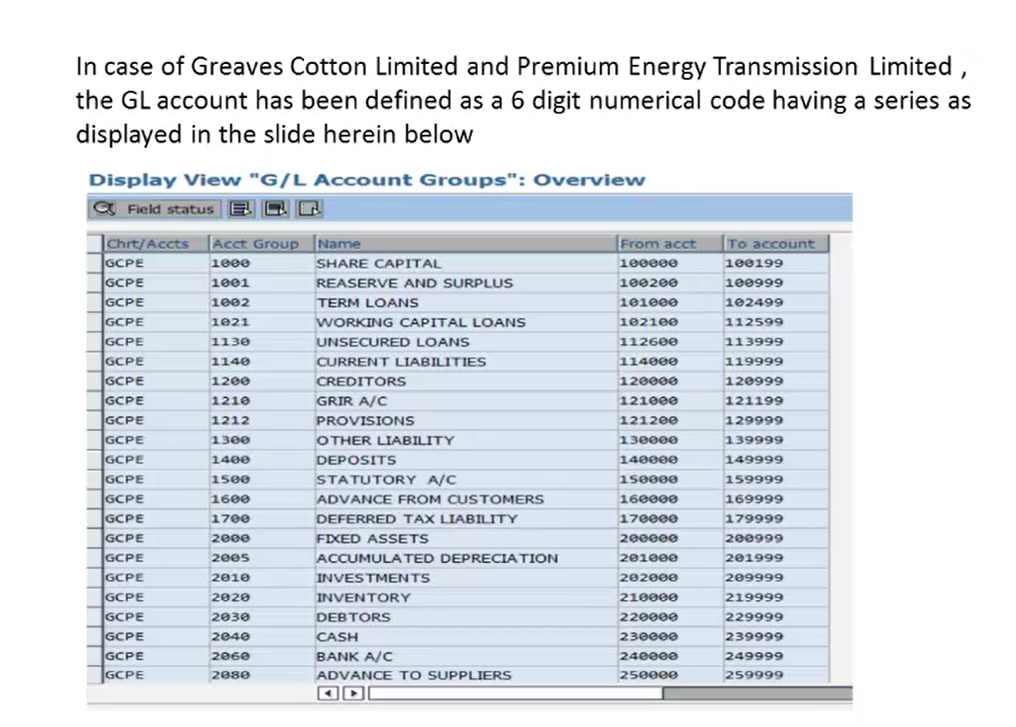
Here, their GL accounts are defined as a 6-digit numerical code, spanning a specific range within the overall chart of accounts. In the above display view of the GL account groups, we have examples where the 6-digit numerical code is assigned to specific GL accounts. This is how we create the GL accounts.
How to Create General Ledger (GL) Account Codes
There are two common methods for creating GL account codes in SAP:
- Via the SAP Easy Access Menu:
- Navigate through the following path: SAP Menu → Accounting → Financial Accounting → General Ledger → Master Records → G/L Accounts → Individual Processing → Create. This path leads you to transaction code FS00.
- Direct Transaction Code Entry: Simply enter the transaction code FS00 directly into the command field and press Enter.
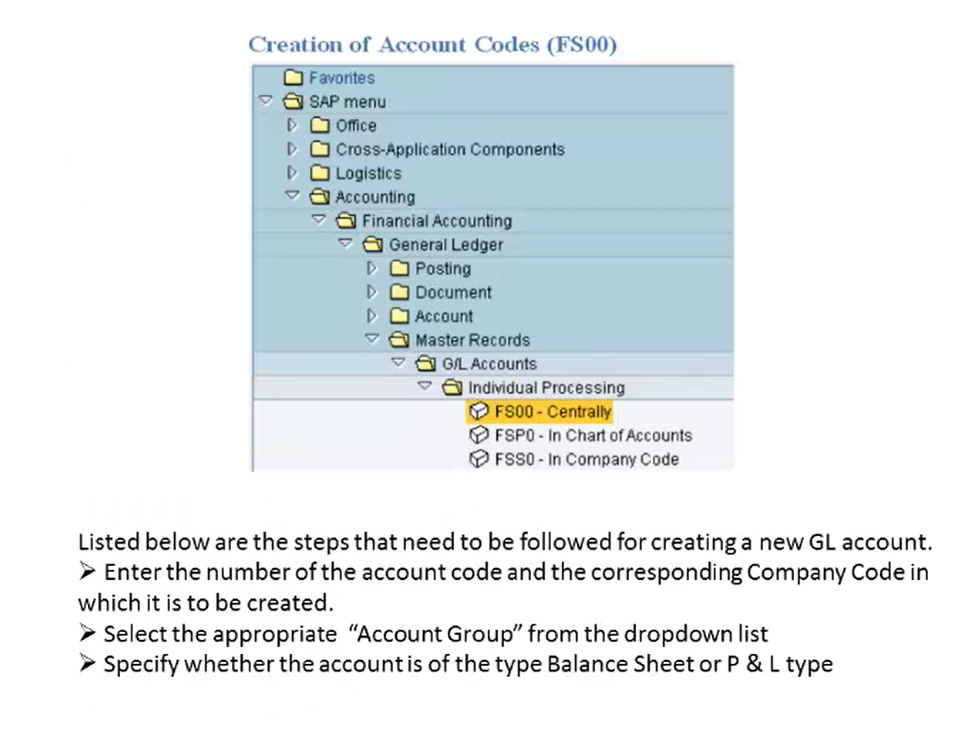
Step-by-Step GL Account Creation (FS00):
After entering the GL account creation screen, follow these steps:
- Enter the number of the account code and the corresponding company code in which it is to be created.
- From the drop-down list, select the appropriate account group for your GL account.
- Specify whether the account is a Balance Sheet account or a Profit and Loss (P&L) account.
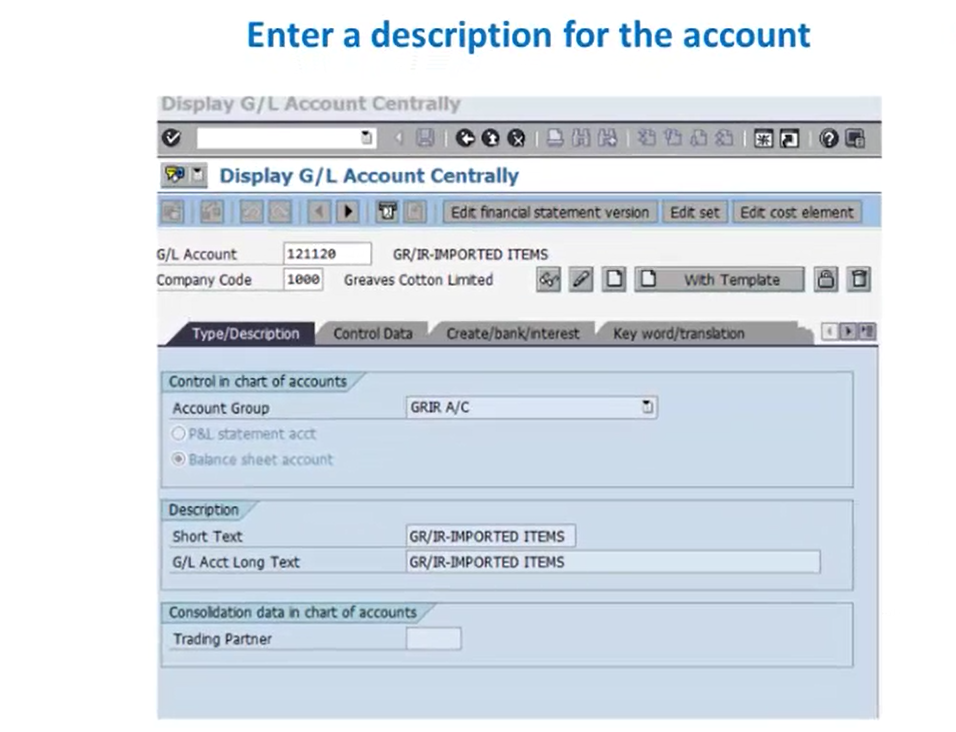
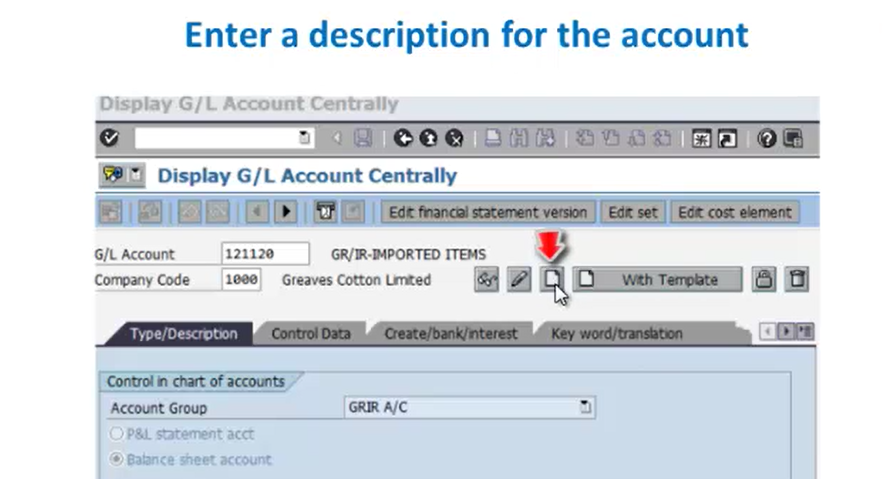
- Give a short text description for the account code (e.g., “GR/IR IMPORTED ITEMS”). You can also provide a longer and more detailed description if needed.
- Click on the Create button as shown in the image below.
 Pro-tip: Before creating a new GL account, execute transaction code F10 to check the next available number in the account group to prevent duplicate entries.
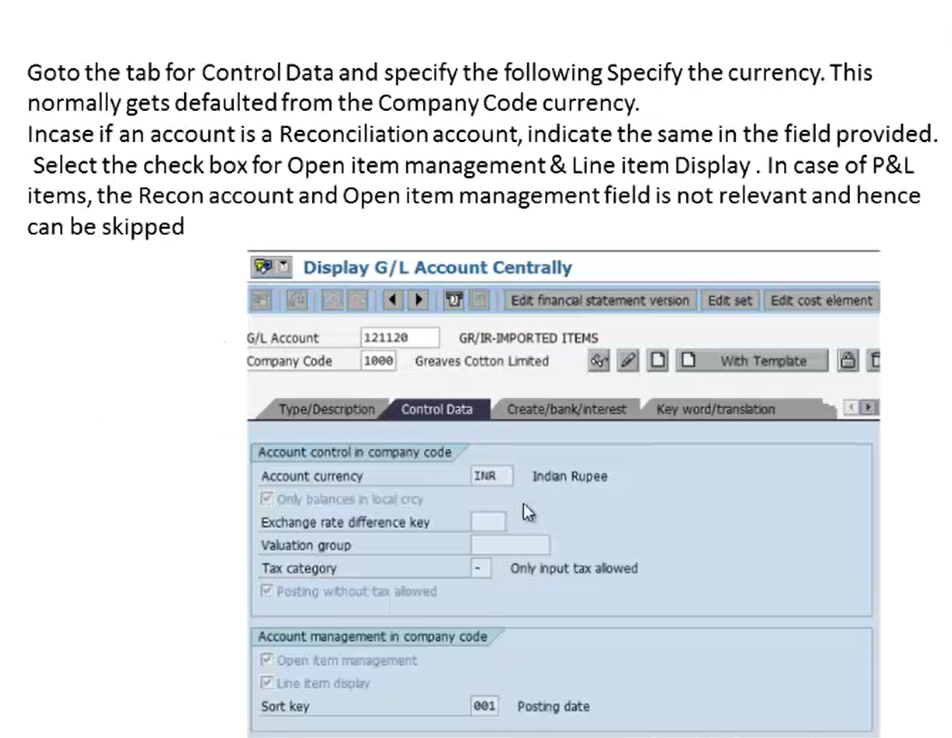
 - Go to the Control Data tab and specify the following things:
- Currency: This usually defaults to the company code currency (e.g., INR).
- Reconciliation Account: Tick if it is a reconciliation account. For P&L items, this field is not relevant.
- Select the checkbox for the Open Item Management and Line Item Display. Not relevant for P&L accounts.
- Move to the Create/Bank/Interest tab. Here, we’ll specify the:
- Field Status Group (FSG): This helps in identifying the fields that are required when booking an entry to the GL account. Select the appropriate FSG from the dropdown list.
- Cash and Liquidity Related GL Accounts: For GL accounts related to cash and liquidity (e.g., bank accounts), you must populate the indicator for Planning Level and mark it as Relevant for Cash Flow.
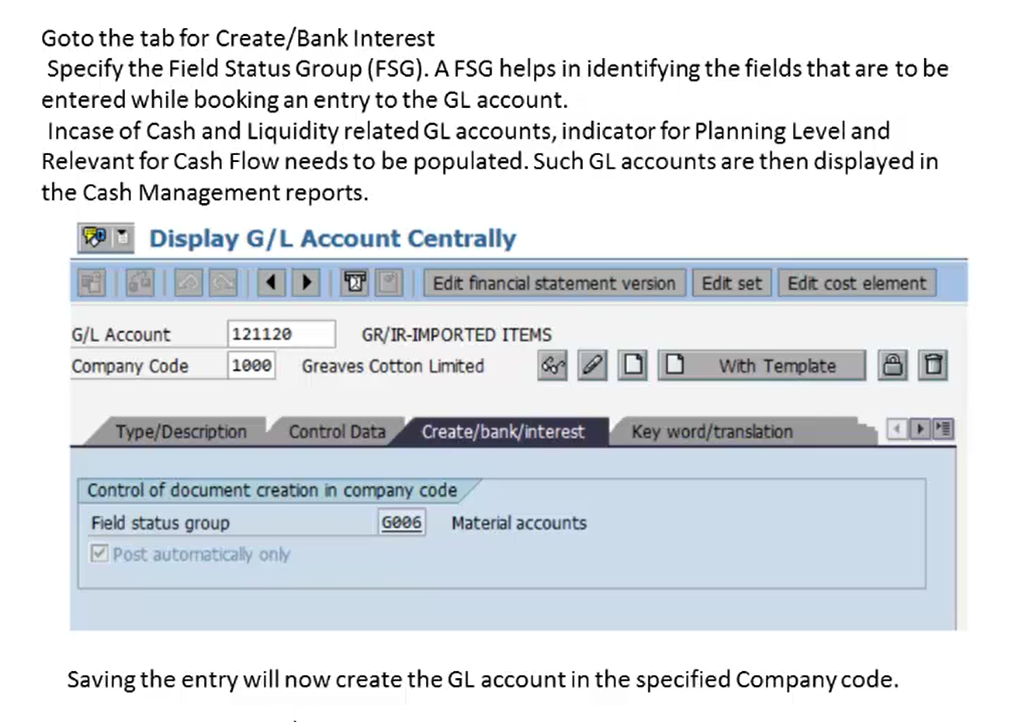
- Finally, click the Save button. The GL account will now be created for the specified company code (e.g., Company Code 1000).
Extending General Ledger (GL) Accounts
Once a GL account is created, you might need to extend it to other company codes where it’s also relevant. To extend GL accounts, we use the transaction code FS15.
Steps for Extending GL Accounts (FS15):
- Enter FS15 in the command field and press Enter.
- On the Extending GL Account screen, remove the tick from the “Check File Only” box. All other fields will be automatically entered by the system.
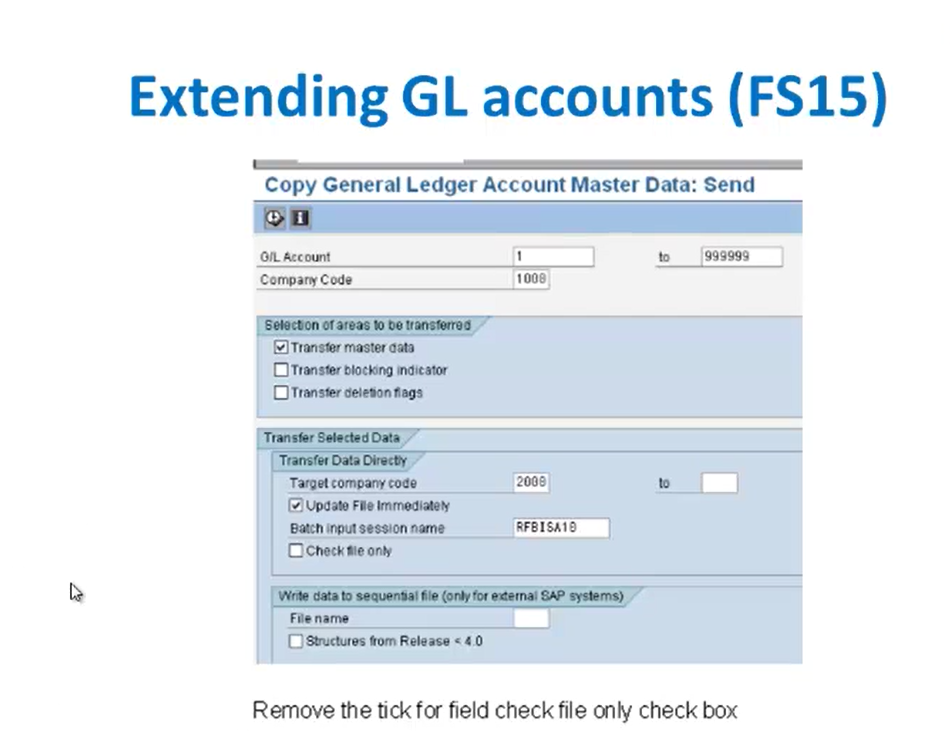
This process copies the master data settings from one company code to another, simplifying G/L maintenance across multiple entities.