
Vendor Master Codes in SAP FICO
In our ongoing exploration of master data in SAP FICO, we’ve covered the creation of primary and secondary cost elements. Today, we’re moving to another critical piece of master data: Vendor Master Codes. Vendor master records are essential for managing business relationships with suppliers, from purchasing to payment.
Thank you for reading this post, don't forget to subscribe!Creating Vendor Master Codes (FK01)
The transaction code for creating a vendor master record is FK01. This process involves maintaining various details about the vendor across different organizational levels and data categories.
Step-by-Step Vendor Master Code Creation (FK01):
- Enter FK01 in the command field and press Enter.
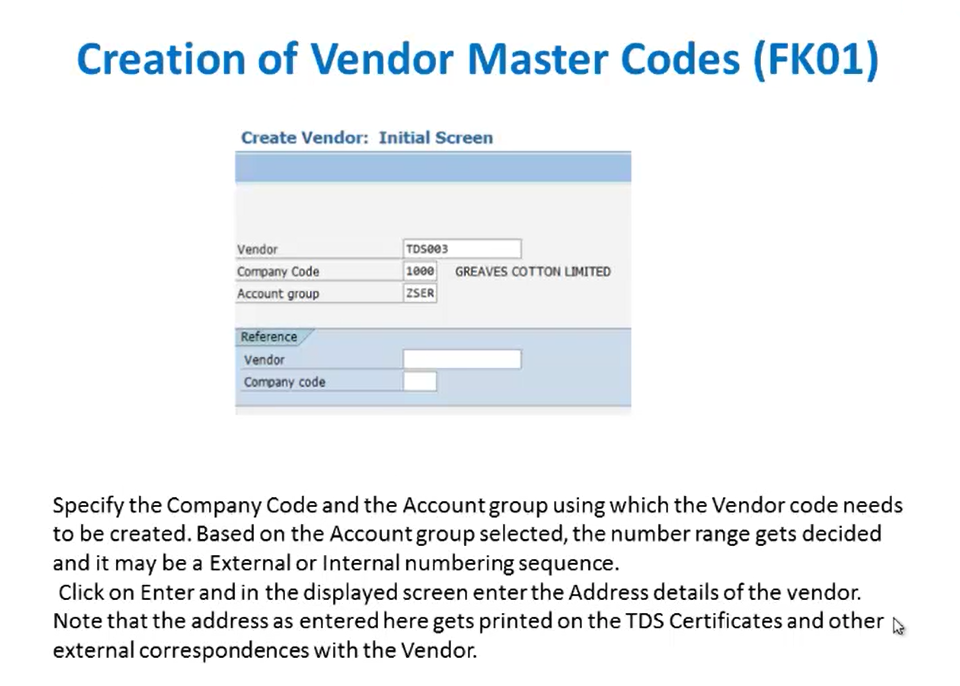
- On the initial screen, specify the company code and the account group in which the vendor codes need to be created. After maintaining the account group, the number range is decided, and it may be an internal or external numbering sequence. In our example, our account group is “ZSER”. After entering these details, press Enter to proceed.
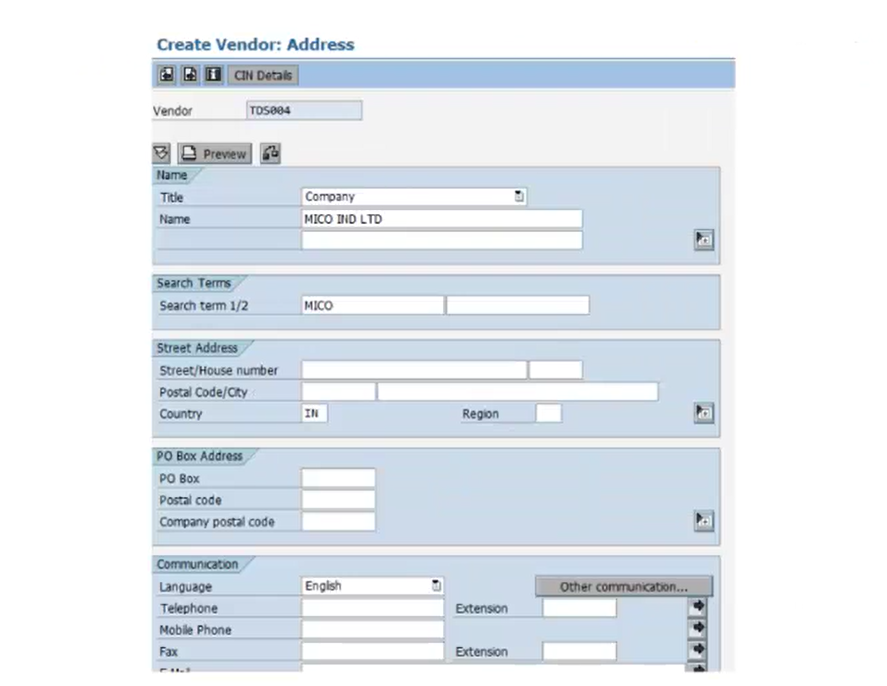
- In the next screen, we’ll maintain the address details for the vendor. This includes the company name, that is the title, the name of the company, then the country code, the PIN code, language, PO box address, etc.
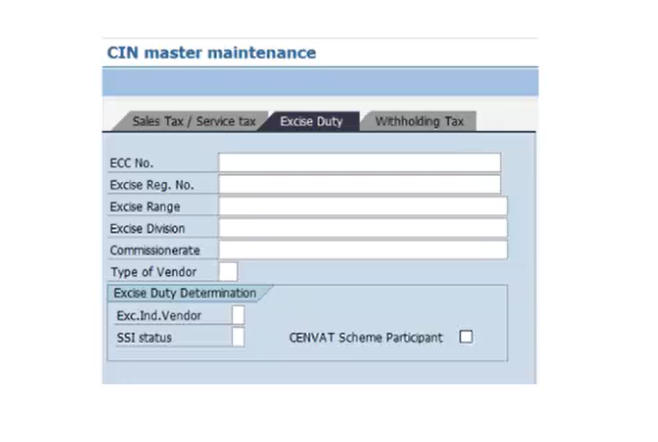
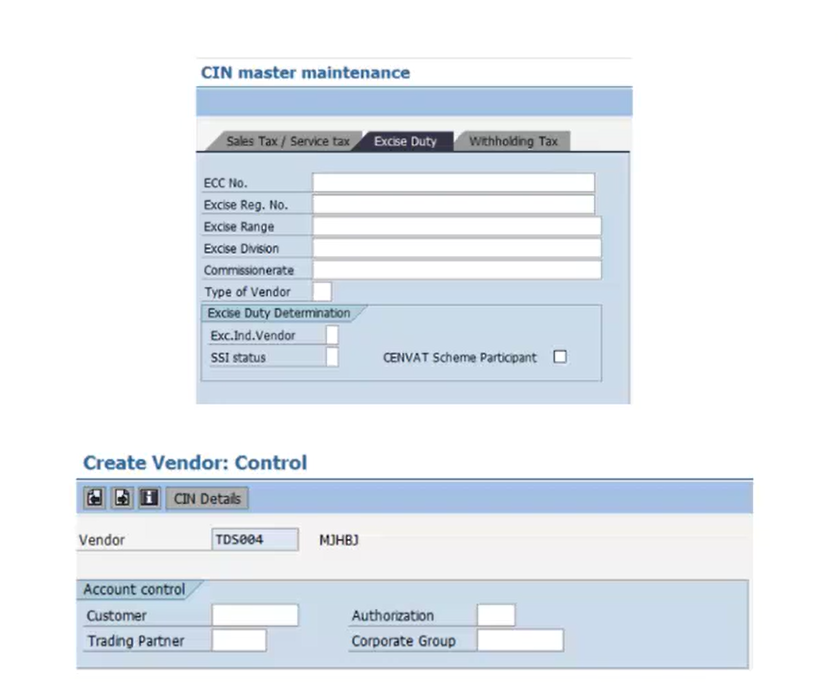
- Click on the CIN Details tab to maintain the CIN Master Data, i.e., Excise Duty data such as ECC Number, Excise Registration number, excise range, excise division, commissioner rate, etc.
- After maintaining these settings, go back to the previous screen where we maintained the vendor data. We’ll now be on a screen where we’ll maintain other important account control data for the vendor.
- Proceed to the Bank Details section. Here, you’ll enter the vendor’s bank account information. There’s an important indicator in this tab, which is a checkbox for the Individual Payee. Selecting this checkbox activates a special screen during document entry. In this screen, the description of the vendor can be entered for that particular document.
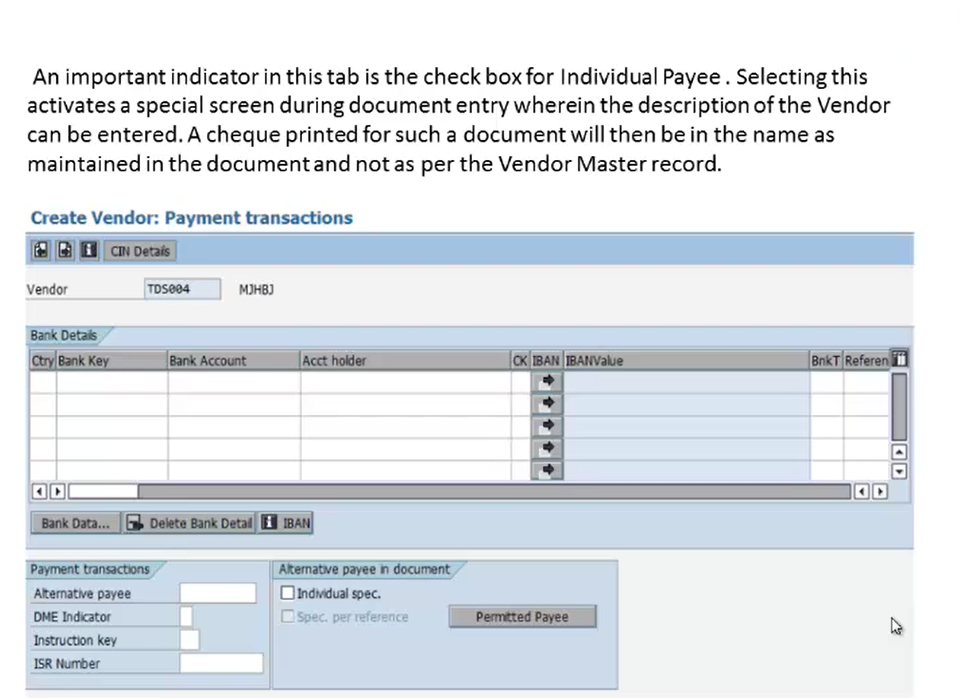 If this box is selected, any check printed for such a document will bear the name entered in that special document entry screen, not the name from the vendor master record. So, this is the importance of the individual payee checkbox.
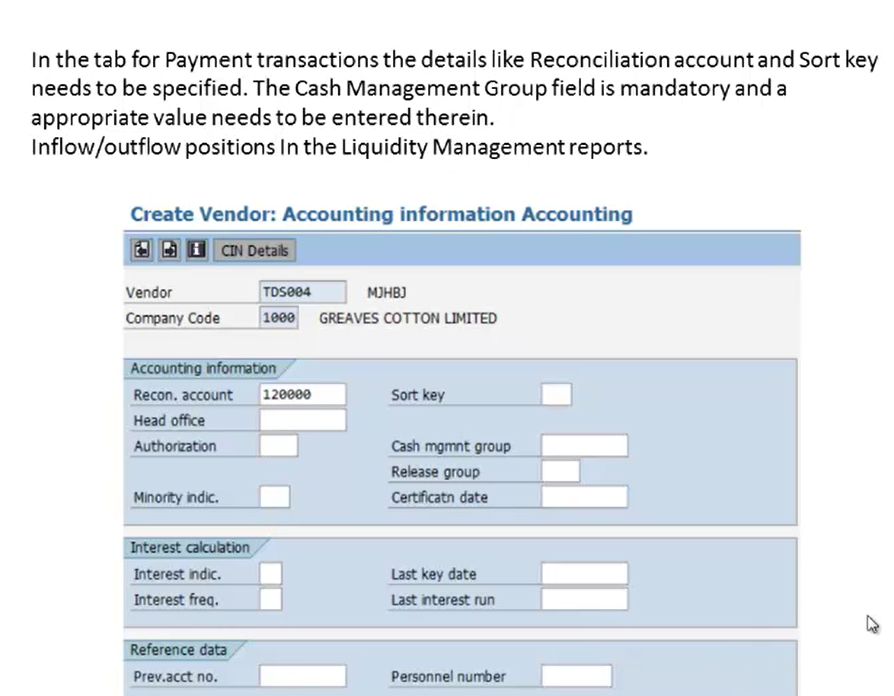
 - Next, go to the Payment Transactions tab. Here, we’ll maintain the payment details such as the reconciliation account, the sort key, and the cash management group key. The cash management group is mandatory and helps with liquidity management reports.
 Here, the payment terms and payment methods can be entered. This serves as the default value at the document entry level and can be changed while booking the transaction. The checkbox for “Chk double invoicing” also needs to be selected while we maintain the payment data.
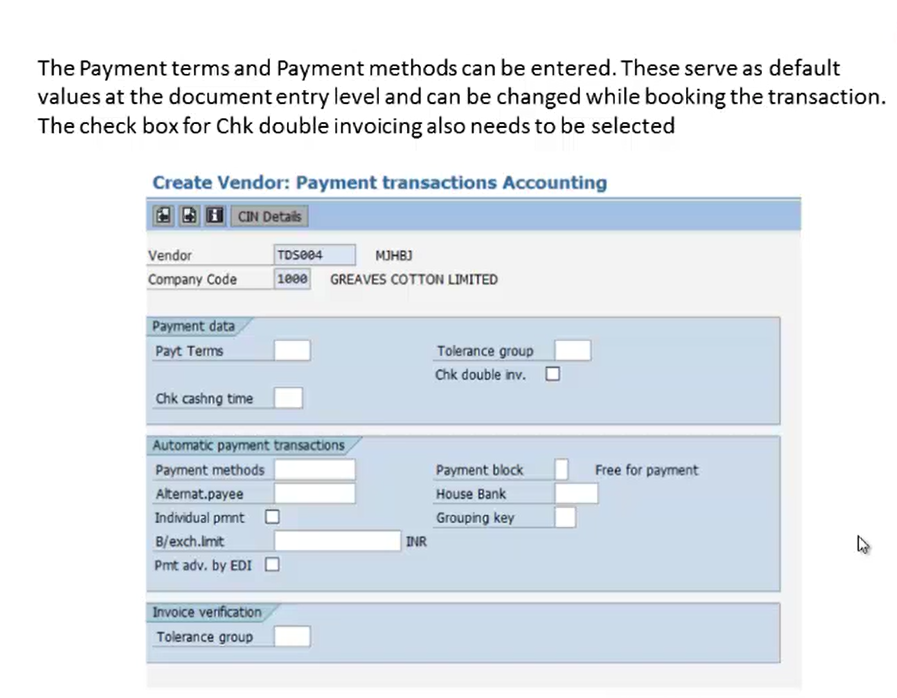
- In the next tab, we have the Correspondence tab. Here, we’ll specify a value in the field for Account Statement. This helps with generating the account statement correspondence.

- Next, we’ll get a screen to maintain the Withholding Tax Information, i.e., it specifies the TDS section under which tax is to be deducted from the invoice payments.
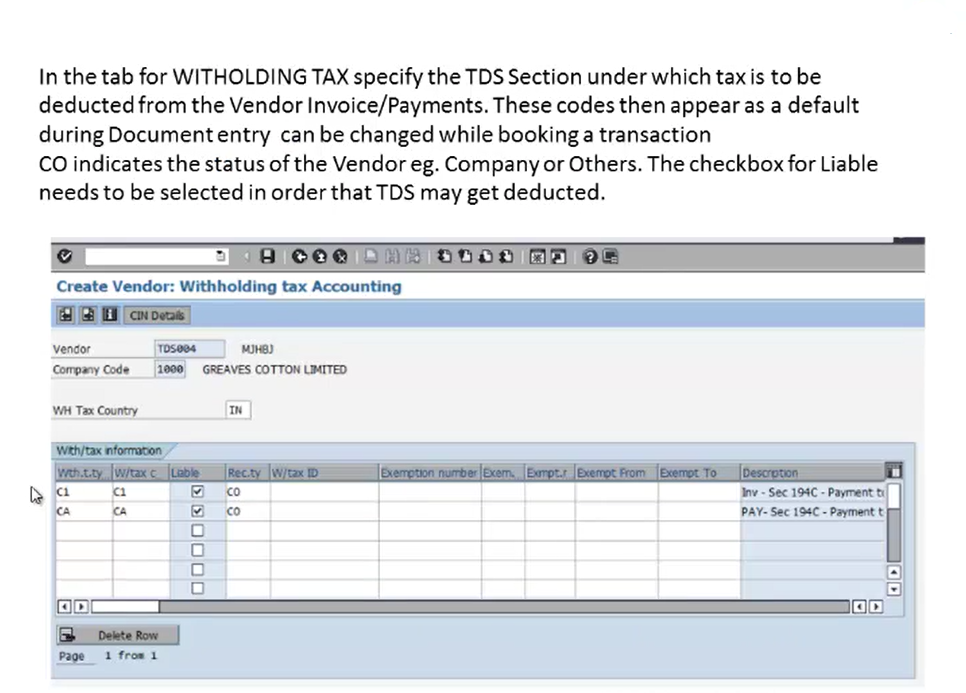 We have seen that the salary which we get has something called withholding tax, which comes under the TDS section; the salary which we get has the TDS section deducted, i.e., the tax which is deducted from the payments we get. Similarly, the vendors we create will have a tax in which the TDS will be deducted. These codes then appear as a default during document entry and can be changed while booking a transaction. Here, we also have controlling (CO), i.e, it indicates the status of the vendor. The checkbox for “Liability” needs to be selected so that TDS may be deducted.
 - After maintaining all these settings, click the Save button to finalize the creation of the vendor master record.
This is how we create vendor master records, where we maintain all the settings, including account information, payment methods, payment type, account types, and tax information. By following these steps, you can easily create and configure vendor master records in SAP FICO to ensure accurate purchasing, payments, and tax compliance.