
Accounts Payable Configuration 2
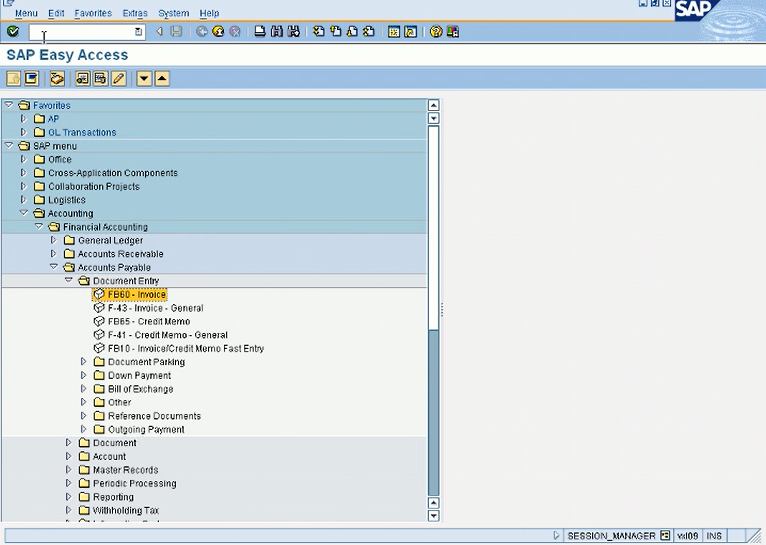
So now we will do FB60, which is a vendor invoice document. So let’s go in. It is very similar to FB50 that we did earlier for the GL. So the same way, we can either we can go on the SAP menu or we can type in the transaction in the command screen. If you want to go from the menu, we can go accounting, financial accounting, accounts payable, document entry, and then FB60.
Thank you for reading this post, don't forget to subscribe!
Or I can just type in here FB60.
So now if you notice this looks very similar to an FB50. And let me compare that also side by side with FB50. And I’m going to compare these two and I will tell you the difference.
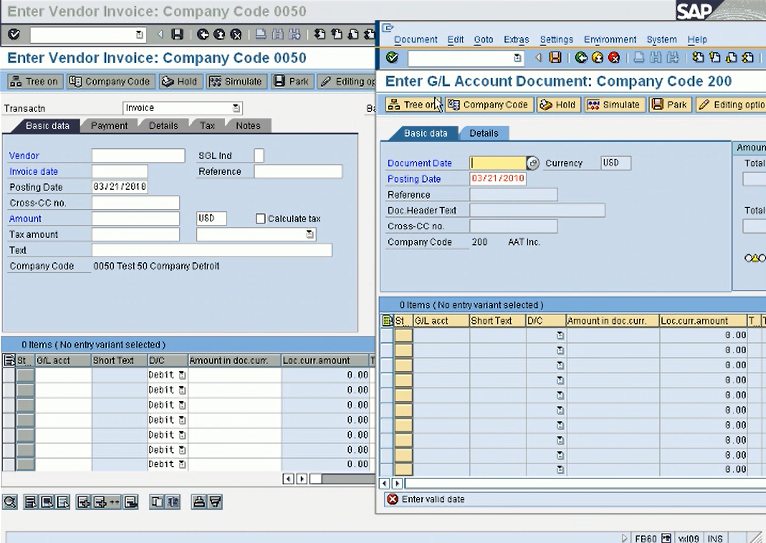
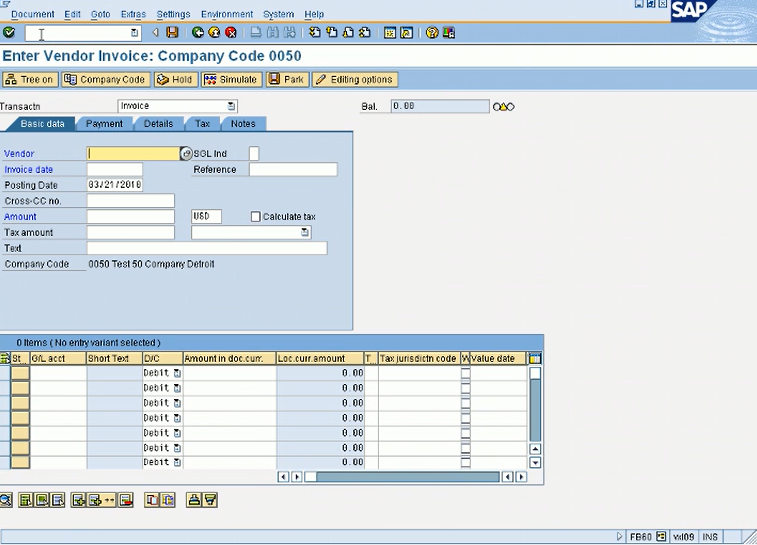
So on my right is FB50 and on my left is FB60. Enter G/L document, Enter vendor invoice. The first difference you will see in the vendor invoice, you see a vendor field. You don’t see that here. And the other thing is for the vendor invoice, you have all these debits already selected for you in the line items. So you just need to pick the GL account, and you see the amount in the header field. You don’t see the amount in the header field because in the GL document, we have to enter both debits and credits in the line item. On the other hand, when we post a vendor invoice, our credit is automatically posted to this vendor account. When we enter a vendor invoice, it’s debit expense, credit vendor. So in FB60, it’s taking care of the credit automatically by just selecting the vendor account number and entering them out. You only need to enter the debit expense account or the prepaid account. In our case, because we have not configured the controlling area yet, we don’t want to use the expense account, but we can use a balance sheet account like a prepaid expense. So we will use that. So, you know, that’s the only difference. And there are some more tabs or payments, like payment terms and all that, but it looks very similar to a FB50 screen.
But before we do that, let’s just create a prepaid expense because we as I mentioned, we don’t have a controlling area configured. So normally, we enter expense account like whatever lab supplies or whatever expense account we like telephone supplies if we are entering a telephone invoice. But in our case, we are just doing the FI config at this point. So we will choose just a prepaid expense account which is a balance sheet account. So I’ll just go in FS00 and create the account. I already have it created, so I’ll just go in, in display mode. Otherwise, you can go in create mode. So I’ll just go in display mode.
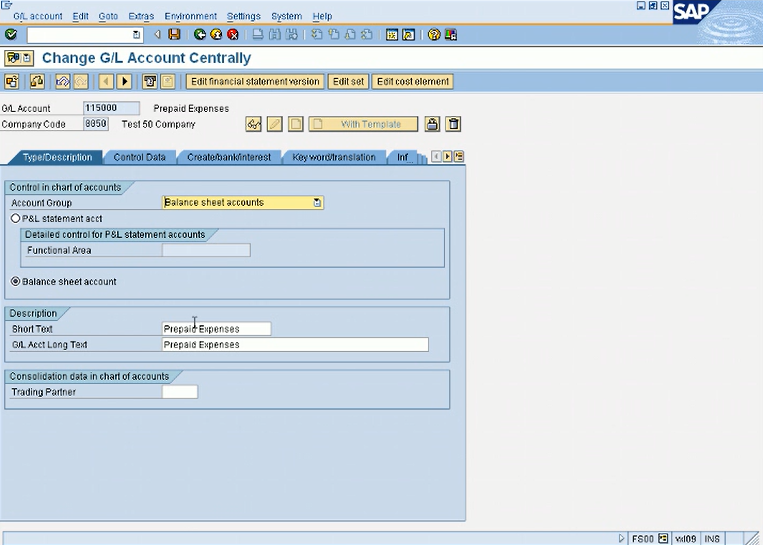
So I don’t have it as a balance sheet account. It should be a balance sheet account. I cannot change it. But in your case, it should be a balance sheet account. And prepaid expenses. And you only need to check line item here and in the third tab just choose whatever you want to use cost accounts or whatever.
So let’s go back in FB60.

So first thing you have to choose is your vendor. If you do a search, just click on the bubble and do a search in your company code like in this selection criteria,
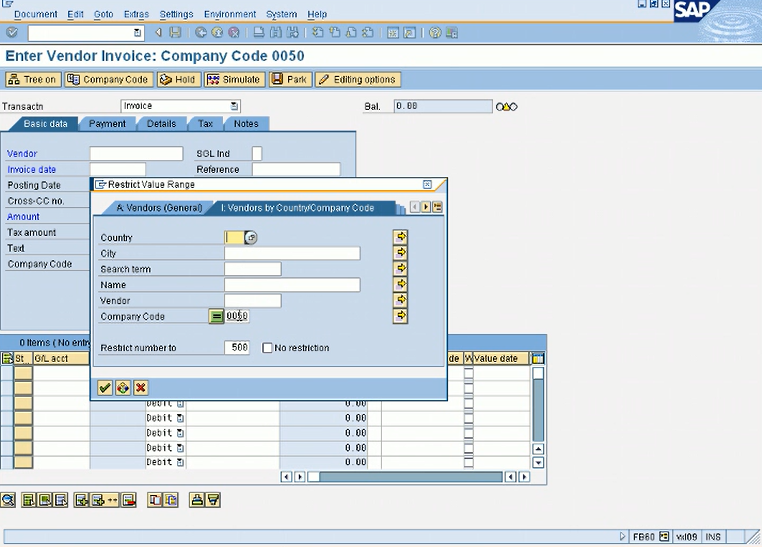
you will get your your vendor number.
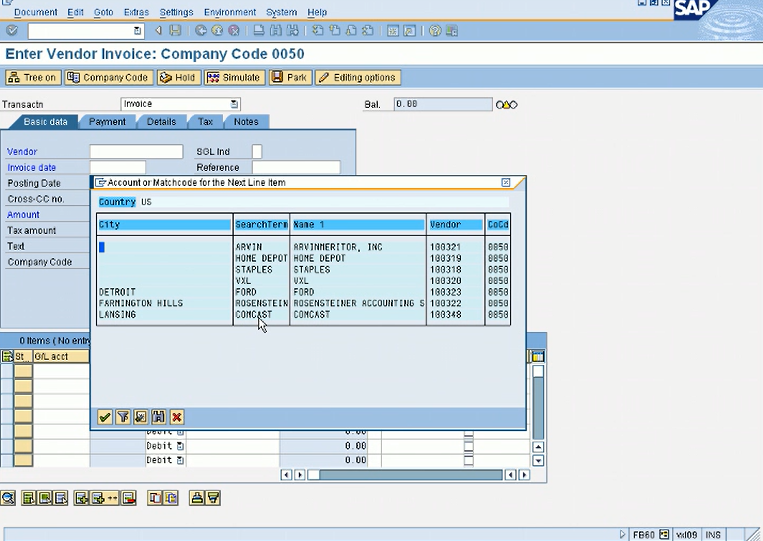
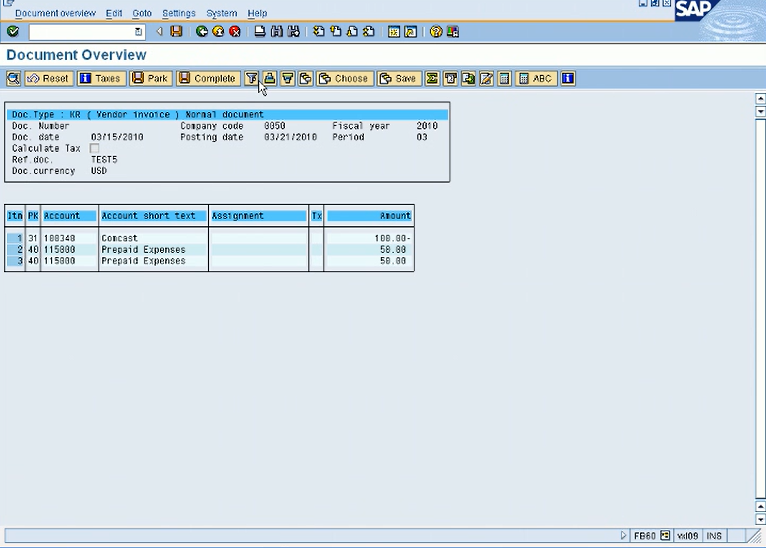
I’ll just use Comcast, the new one that I created. I’ll just double click on it. So I have my vendor number here. Invoice date, I’ll just enter today’s date. And in reference field, you enter whatever the invoice number that is listed on the vendor invoice, and that’s a very important field. I’ll just choose test 5. So that’s normally the vendor invoice number. I’ll just do it for $100. So, you know, on the header, we have the total amount. You know, on the line item, we can have multiple lines. Let me give example of a telephone bill. It might be for 10 different telephones that belong to 10 different departments and you want to create, you wanna post to those 10 different departments. So in that case, you will need 10 line items, each posted to that department, which right now we don’t have because we don’t have a control area, but we will soon have when we will do. So in that case, let’s say the bill is for $1,000 and it’s $100 for each department. So basically, you will have a $100 line item for each department. So you’ll enter the GL account, amount and that cost center 1, cost center 2. So this total will be this amount, whatever that amount is. So that’s because, you know, your 10 line item will be debited to the expense, but your credit will just go to the to the vendor account. So there’ll be one credit, which will be posted by the document header. And just to give you some more information, we know that this amount on the header level is gonna credit our vendor and at the same time, it will also update our GL account. The reconciliation GL account that we just created and entered in the vendor master. And we can also see that. I’ll show you in a minute. So let’s just go ahead and enter our prepaid expense that we created or I can search it.
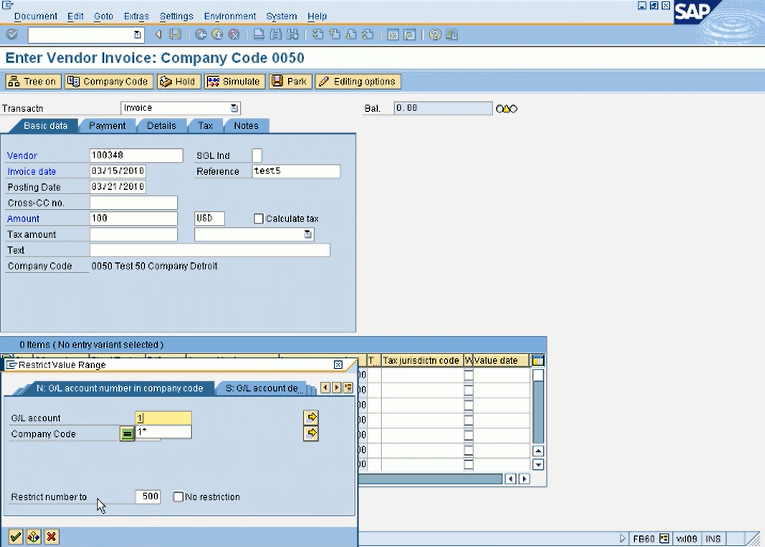
If I don’t know the number, I’ll just search, I’m starting with 1. I’ll put 1 star and this will give me all GL accounts starting with 1 in my company code. So I’ll just choose my prepaid expenses, 115000. So that’s the account I want to debit. And let’s do 2 line items. So I’ll do $50 for 1. But we don’t have a department, so we have to leave it blank. But, you know, just wanna show you that we can do 2 different line. So we have $50 for each, and the total is 100.
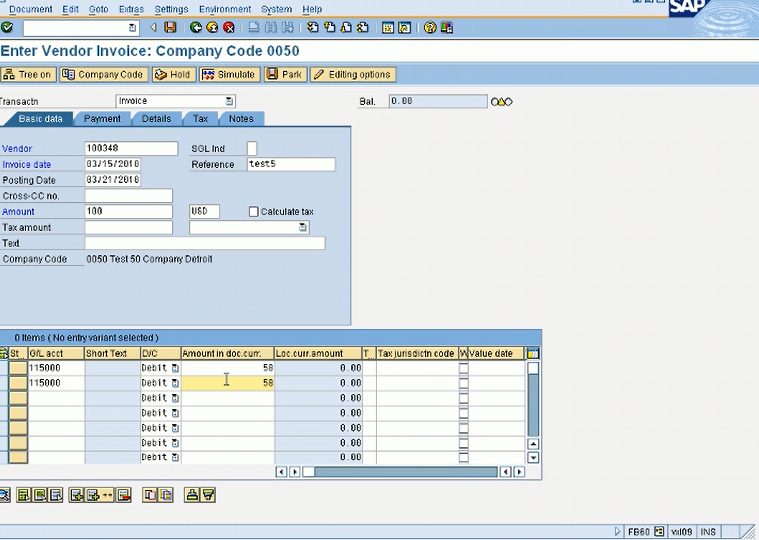
And you can see I have a green light here. So this balance, you know, totaled the line items with my header amount. This is the header and these are the line items. So I have a green light, which means there are no errors. I’m ready to post this document, but before it’s a good practice before you post any document, click on simulate. If I click on simulate, it will show me how it will post.

And let me show you now, so what it’s doing, it’s gonna credit $100 to the vendor account and do 2 debits, the deposit sign debits to these expense accounts. Let me double click on my vendor account.
And here, you will see my G/L account, the reconciliation G/L account that I entered in the vendor master. That’s why it’s always reconciled. So if I’m ready to post it, I can just post it from here, click on save icon.
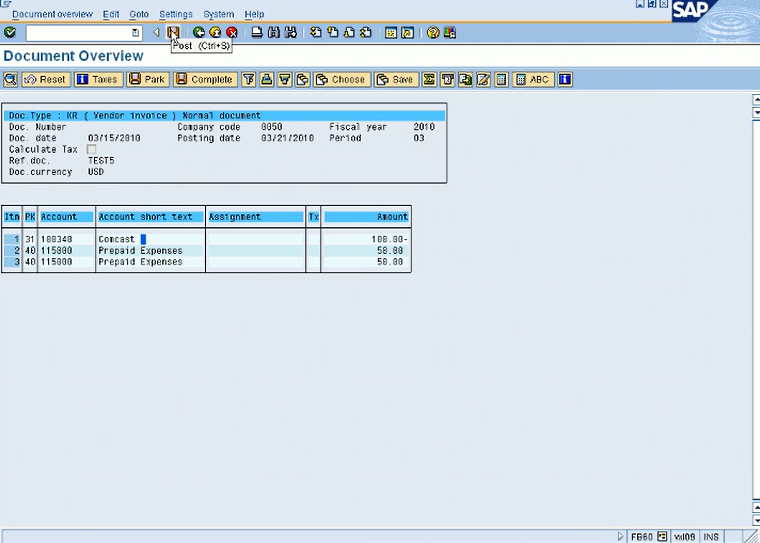
So I’ll click on post, and I will get the document number at the bottom of my screen.

Document number this was posted in company code 0050.
We use the FS10N to display GL balances The same way. S stands in German stands for general ledger, starts something with f. For vendor, it’s FK10N.
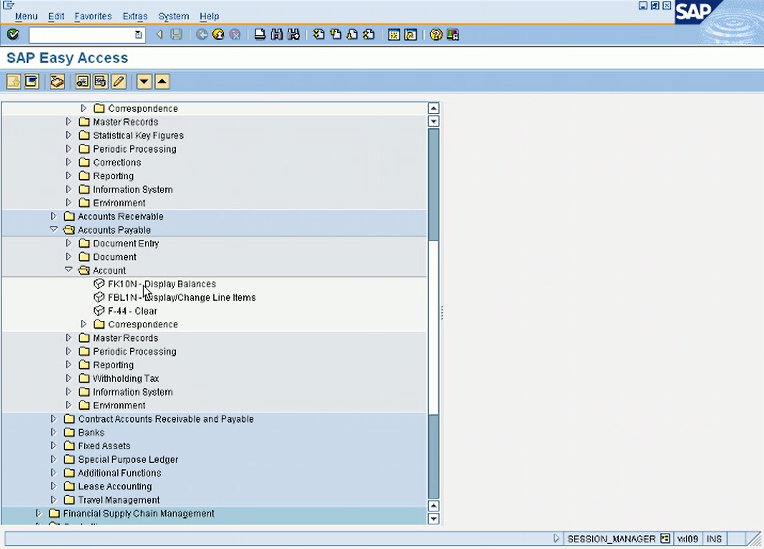
So if I go in FK10N and then you just enter your vendor number, and company code, fiscal year, then execute.
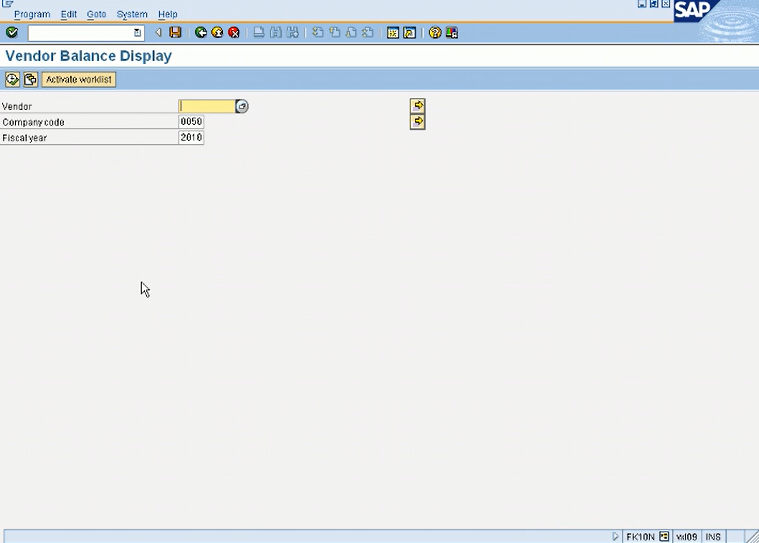
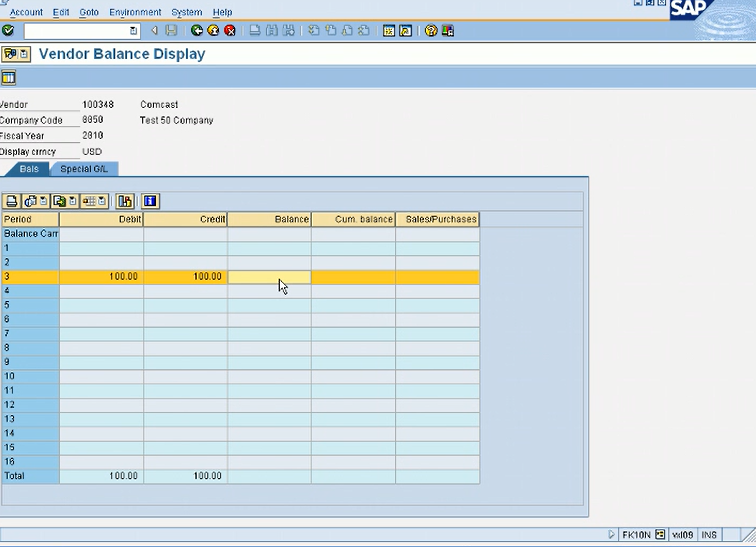
So if I enter my vendor number of company code in fiscal year and execute, it will give me the balance for my vendor.
So it means I have one invoice for $100, so I have a $100 credit for this vendor. And if I double click on it, it’ll give me this invoice with a red light.
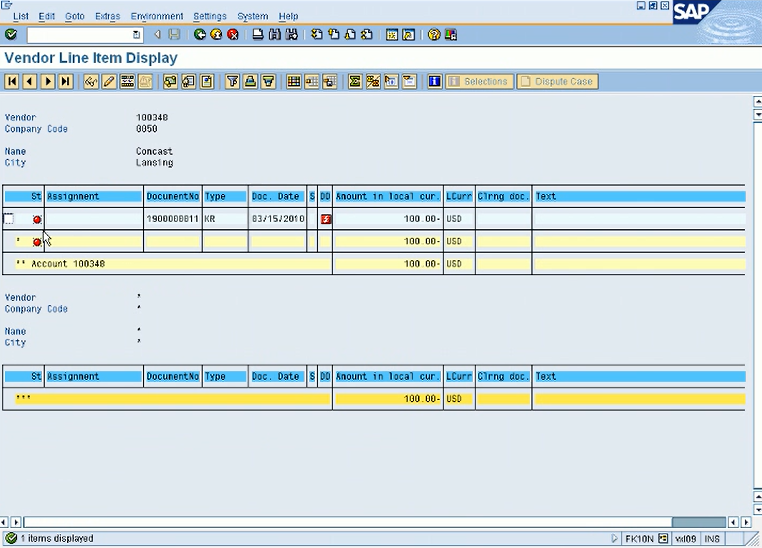
So what does the red light mean? Red light means it’s an open document. It means it’s not a clear document. So all the vendor and account and customer documents are open line item management, which means they are either cleared or open. So when you post the documents open and when, let’s say we process a payment, then this document will be cleared and another debit normally when we do payment process, what happens is we debit the vendor that will clear this open invoice and we credit a cash clearing cash account if we are paying by cash. So that will clear this vendor and then it will have a green light. Or if we enter a credit memo, let’s say after entering this invoice, we just got a credit memo from the vendor, which means we don’t have to pay this invoice if, you know, if it’s, let’s say, for the same amount. In that case, we will enter the credit memo and one option is we can manually match these two documents and clear them. So eventually we will do payment processing and then clear these, but at this point, let’s enter a credit memo for the same amount and then we’ll manually clear these two documents with F-44. Let’s do that.
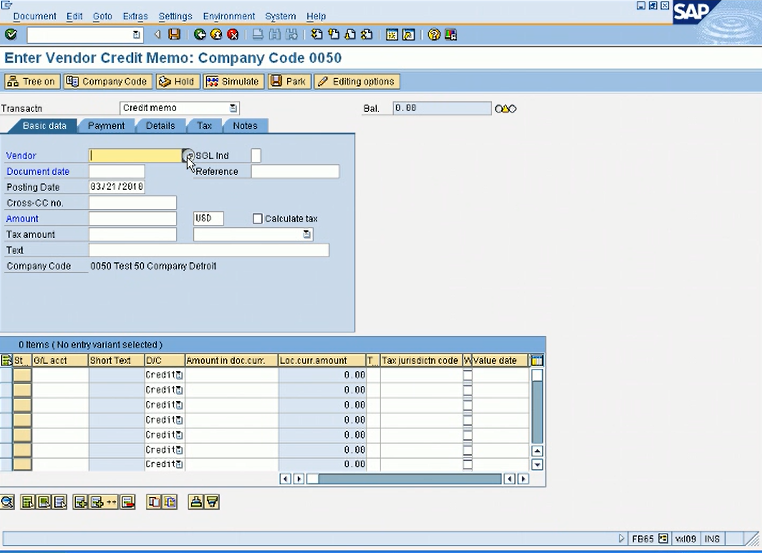
So my amount is $100 and take your amount also and enter a credit memo and I’ll show you how we do that and then we’ll come back and see the balance and then we clear them. So FB60 was to post invoice and FB65 is a credit memo, a vendor credit memo. We will do FB65 this time.
So I was doing it for Comcast. And also on the top, it will say credit memo and transaction screen. So let me do it for $100. I’ll just do one line item.
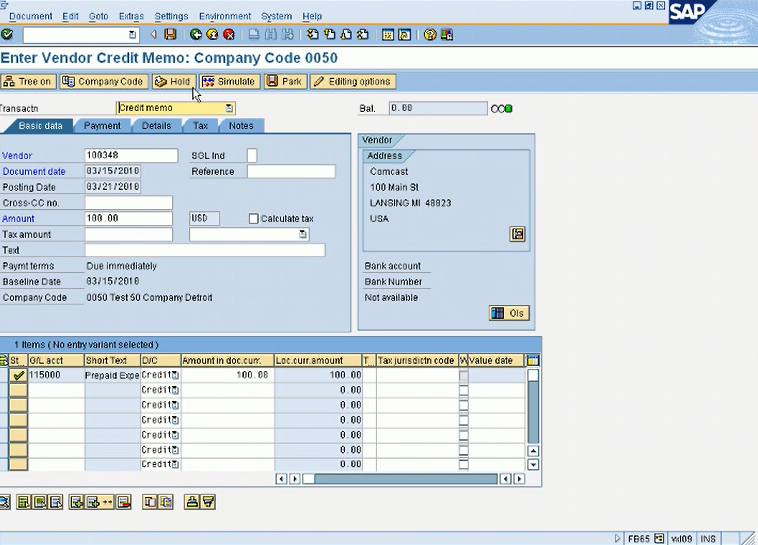
We have a green light. So let me go ahead and post this. So this document number is credit memo is posted.
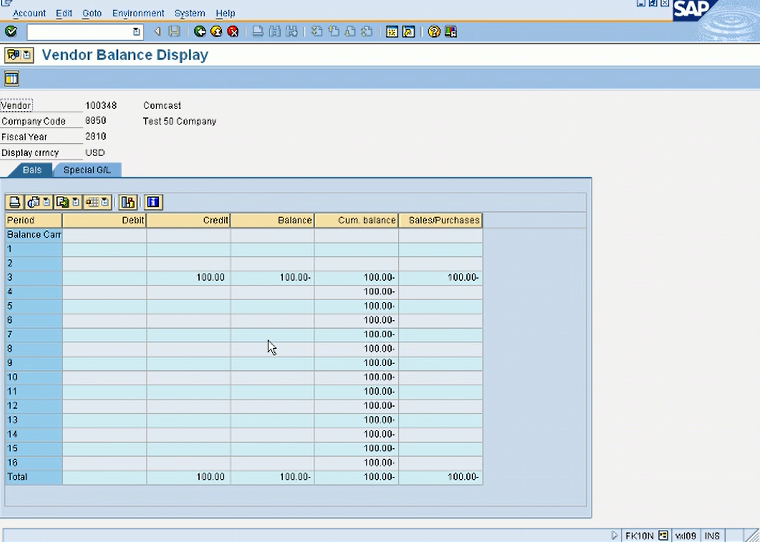
Let’s go back again in FK10 and see the balance.
So see the balance is 0 and the balance column has nothing and I have a 100 debit and a 100 credit in the month of March. So I’ll just double click on the balance column to see both documents

And I see 2 red lights and 2 documents. $100 debit, document type KG and $100 credit, document type KR. So now one option is I can manually match these 2 so these are cleared and the light will turn green and then they will not show up as open items. Because it’s very important in AP and AR, you wanna see your open items. So because those are the items that you have to pay. The ones that are cleared, those are done, so you don’t have to deal with them. So that’s why if we don’t have this functionality, it’s very hard to see which invoices we have to pay, which are paid. So this clearing option red and green light gives all that information to us. But normally, as I was saying that it is done automatically when you select the invoice for payment, it’s automatically cleared. But we will do that later because we need to configure our payment method first. But now since we can do the manual process anytime by just entering a credit memo and now we will do F-44 and manually clear these.
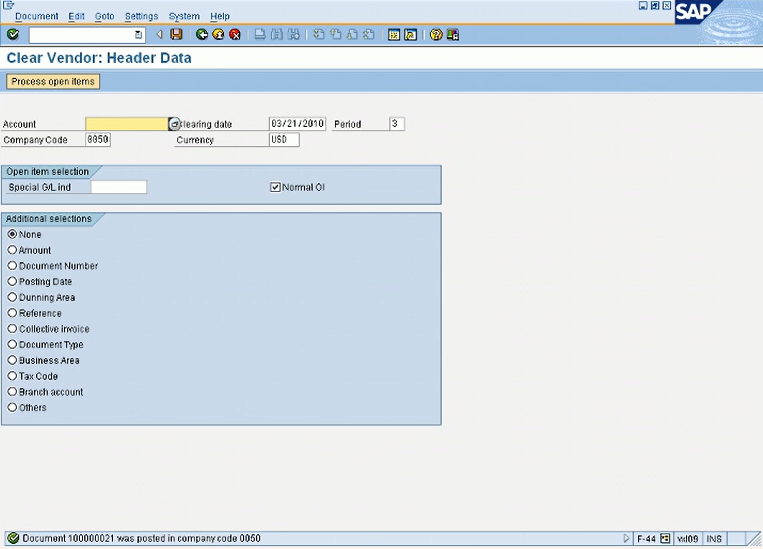
So let me go in F-44 and I can also go from here, F-44 from the menu or I can just type it.
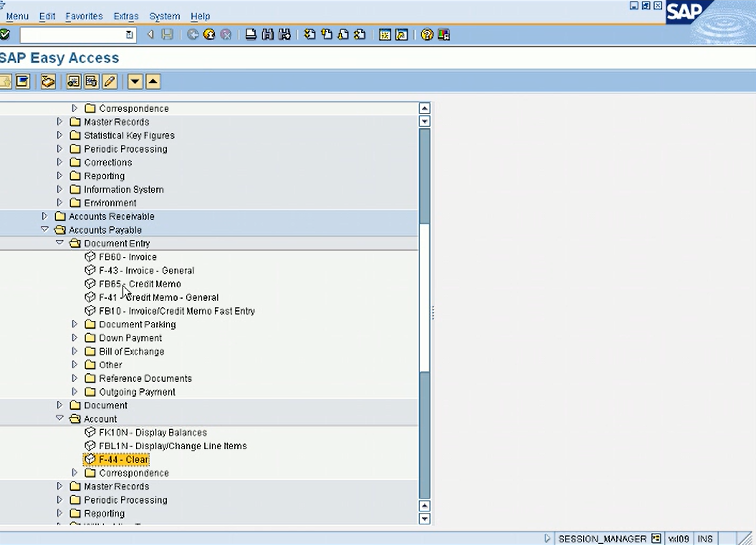
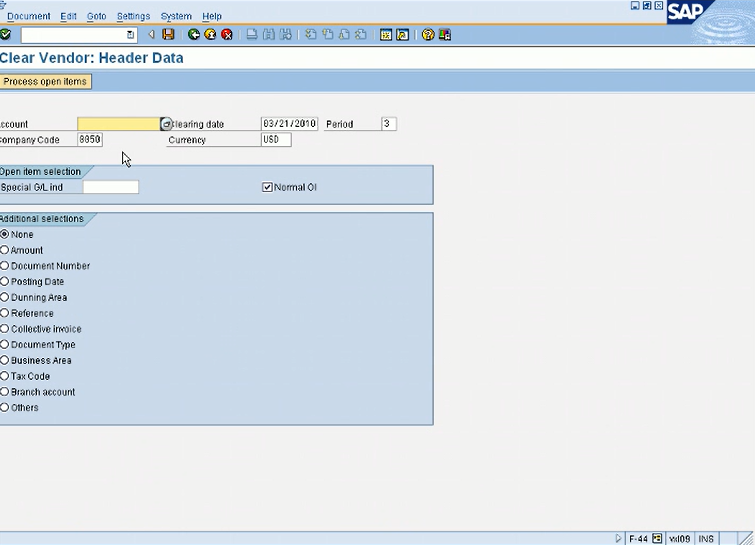
So this is a very old transaction. It’s not very intuitive. So you will you need to see what we’re doing. So it’s not like FB50 or FB60. So account will be your vendor account number. My case is 100348. And then I will just click on process open items.

As you can see it has automatically selected these two documents because they are in blue color and at the bottom it’s also saying 2 items were selected. But in case there are like hundreds of documents it won’t select all of them. If I double click on them it will turn black which means they will not be selected and I will have some amounts will appear here that amount assigned or different something like that. Let me double click on it. See now first line is unselected, so I have assigned 100 minus because this is not and not assigned 100. If I double click on this again, second one then I will have nothing assigned and nothing will happen.
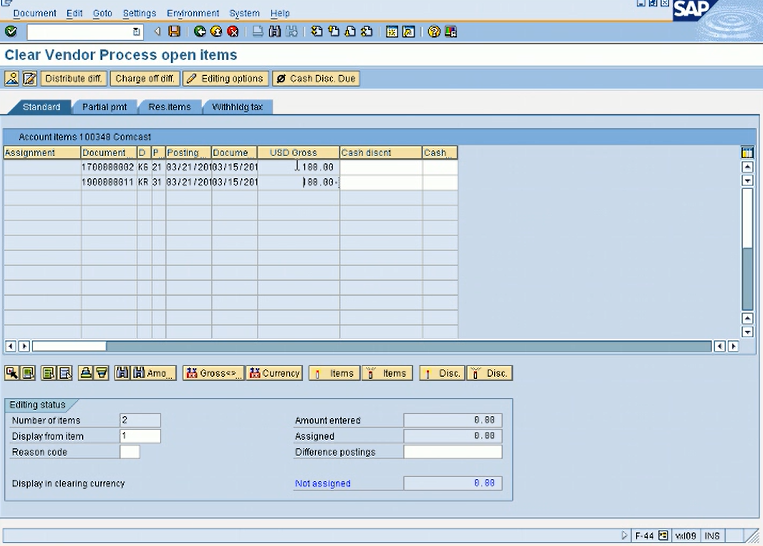
But now because I want to pick these 2 normally, what you will do, you will come here and select the documents that you want to manually clear. So I’ll just double click on this again, turn blue. Double click on this again, turn blue again. So now I have the difference is 0 because they’re both tying out. Now these are selected for clearing, and I can just click on save, and it will clear them. And it has posted a new document also which cleared these 2 open documents.
So that’s how you manually clear your invoices.